


EKOO S090 vs Mobius Video Camera
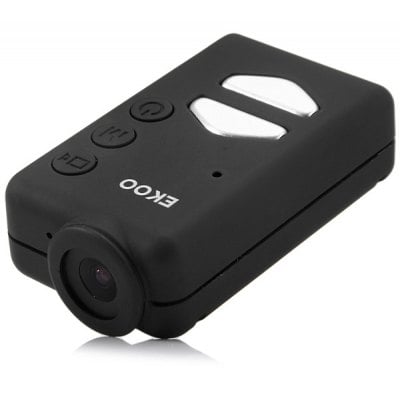
Looks familiar? Our favorite lightweight FPV camera 808 or Mobius faces another match, the new EKOO S090. We will do a side by side comparison and load it up on a plane and take it for a flight. It cost less than a Mobius and has a time lapse function, photos with delays between images range from 0.25 to 60 sec. Loop recording the usual, useful for security cameras. Like the Mobius, the Power button has a delay to prevent premature activation while handling.
 There are 3 versions of lenses: H 140 degrees, V 102 degrees, D 170 degrees…
Specification:
•TV out (PAL or NTSC)
•Storage Max External Card Supported: TF 32G (not included)
•Class Rating Requirements: Class 10 or Above
•Power Battery type: Built-in
•Charge Way : USB charge by PC
•Video/Image/Audio Decode Format: H.264
•Video Format: MOV
•Video Resolution : 1080P (1920 x 1080), 720P (1280 x 720)
•Video System: PAL, NTSC
•Video Frame Rate: 30fps, 60fps
•Video Output: HDMI
•Image Format : JPG
•Audio System: Built-in microphone/speacker (AAC)
•White Balance Mode: Auto
•Functions Interface Type: USB 2.0, SD card slot
•Language: French, Italian, Spanish, German, Traditional Chinese, English
Product Weight: 0.037 kg
Package Weight: 0.150 kg
Product Size (L x W x H): 6.2 x 3.5 x 1.7 cm / 2.44 x 1.38 x 0.67 inches
Package Size (L x W x H): 11.0 x 8.0 x 6.0 cm / 4.32 x 3.14 x 2.36 inches
Package Contents: 1 x S090 Sports Camera, 1 x USB Cable, 1 x Hexagon Wrench, 1 x Mounting Sleeve, 2 x Accessories Simple structure and light weight CNC aluminum alloy structure
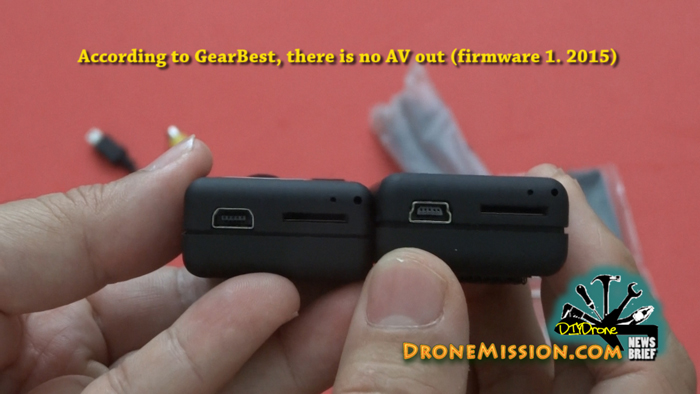
 At the moment there is no AV out, software or instructions, but it functions like a Mobius.
Pros: Cheap alternate security camera
Cons: no AV out, software
Opinion: Not recommended. Spend your money on a Mobius instead.
 Internal Notes Ekoo and Mobius Instructions
The Power button
Press the power button to turn the camera on. The blue LED will turn on for about 1 second
before the firmware starts to load. After about 3 seconds the yellow LED will turn on
indicating the camera is ready for use (standby). If Power On Delay is set to ON, press the
power button for about 4 seconds until the yellow LED turns on.
· Power On Delay is useful to prevent the camera from being inadvertently turned on.
· If the camera has been configured with Auto Power On Record set to On, the
camera will automatically begin recording in Mode 1.
· To turn off the camera, first stop any recordings that may be running by pressing the
shutter button and then press the power button for at least half a second (some
firmware versions require you to press the button for 2 seconds). The camera will
turn off.
The Mode button
The Mode button enables the camera to be sequentially switched between 4 different
modes. Each button press advances to the next mode indicated by the LED color.
· Video Mode 1 (yellow LED). The frame rate, resolution, AOV and rotation can
be individually configured.
· Video Mode 2 (blue LED). The frame rate, resolution, AOV and rotation can
be individually configured.
· Photo Mode (red LED) which includes Time-Lapse photos.
· Playback Mode (red LED) is only possible when the special A/V-out cable is
connected.
The Shutter button
Press the shutter button to start or end a video recording, to take a picture or to play/pause
when in Playback mode. Playback mode is only available when the A/V cable is attached.
LED status indicators
Since the camera has many functions, it’s important to understand the meaning of the
LEDs. The following LED states are for a camera not connected to the PC.
Yellow LED remains on:
· The camera is in Video Mode 1 and is on standby.
Yellow LED slowly flashes (1 sec. On, 1 sec. Off):
· The camera is in Video Mode 1 and is recording video. The Video Recording
indicator (see configuration) must be ON for this to work.
Blue LED remains on:
· The camera is in Video Mode 2 and is on standby.
Blue LED slowly flashes (1 sec. On, 1 sec. Off):
· The camera is in Video Mode 2 and is recording video. The Video Recording
indicator (see configuration) must be ON for this to work.
Red LED remains on:
· Camera is in Photo Mode or Playback Mode (if an A/V cable is connected) and is on
standby.
Red LED flashes once
· The camera has taken a picture
Green LED is on:
· The battery is charging
The rear LED
When the camera is turned on, the rear LED will blink one to three times to indicate the
battery charge. Three blinks indicate a full battery, whereas one blink indicates the battery
charge is getting low. The blinks are fast. Slower blinks would unnecessarily extend the
time before the camera reaches standby mode. If the camera is configured to show the
Recording Indicator, then the rear LED will normally blink in sequence with the main LED
while recording. The rear LED will not blink when Photo Mode has been configured to take
Time-Lapse Photos with a time interval of less than 2 seconds.
Connecting the camera to the PC
Make sure a card is inserted and the camera is turned OFF if you want to access the
camera as an external device (disk drive, setup). Always connect the camera directly to the
PC. Do not use a USB hub.
► You cannot record video or photos if the camera is connected to the PC as an external
drive.
Charging
· Connect one end of the supplied standard USB cable to the camera.
· Connect the other end to a USB, 5V DC power source (wall charger, PC or external
battery).
· When the yellow LED turns on, briefly press the Power button to turn the camera
OFF
NOTE: Charging when connected to a PC USB port can be toggled ON or OFF using the
setup program. When connecting to a Smartphone, you should turn this functionality OFF!
When charging, the green LED will be on, and it will turn off when the battery is fully
charged.
Charging takes about 2.5 hours for a fully discharged battery with the camera turned off and
connected to an external USB Charger. Batteries are not covered under warranty. Charging
is limited to around 140mA which offers the best possible long-term battery protection. If
charged with under-rated chargers or by using a USB hub without an additional power
supply, expect longer charging times. For optimum results, the charging voltage should be
+5V under load. Only use quality chargers capable of supplying 1000mA (1A) and a stable
voltage of at least 5V. Low quality chargers may not be able to supply enough current and
can lead to premature battery failure or, in the worst case, even destroy the camera.
►A new hardware revision, released September 2014, is designed for 820mAh batteries
which have a higher capacity than the original 520mAh batteries. The new battery is
compatible with older hardware revisions but will take longer to charge. The new battery
allows recording for over 2 hours whereas the 520mAh battery will only last about 80
minutes. All boards stamped with 2014-08-19 or later also offer over-voltage protection up
to max. 24 Volt. If the external voltage exceeds 5V the camera will not start or charge.
Automatic Power Off from Standby mode
If the camera is in Standby mode (Video Mode 1, Video Mode 2 or Photo Mode) you must
take a picture(s) or start a video recording within *30 seconds. The camera will
automatically turn off after *30 seconds of no activity.
*This value can be set using the setup program. Automatic Power Off can also disabled.
When the special A/V cable is connected, automatic power-off will be disabled. This
prevents signal loss during fpv use when Standby times out.
Turn on Camera
Power-On can be configured as “fast” or “delayed”. In fast mode, the camera will turn on
immediately when the Power Button is pressed. In delayed mode, press and hold the
Power Button for 4-5 seconds until the Yellow LED turns on and remains on. Irrespective of
whether the camera is configured as “fast” or “delayed” Power-on, the blue LED will turn on
for a second followed by the yellow LED. When the yellow LED remains on, the camera is
ready for use.
· If the camera has been configured with “Auto Power-On Record” set to ON, the
camera will automatically begin recording in Mode 1 as soon as the power button is
pressed or external power is connected. If the recording LED has been disabled, the
yellow LED will blink 3 times and then turn off, indicating that recording has started.
Otherwise the yellow LED will slowly flash at 2 second intervals indicating that the
camera is recording.
· If the camera has been configured with “Auto Record” set to OFF (default setting),
the camera will switch to Video Mode 1 (yellow LED) and remain in standby mode
until a button is pressed or Auto-Power-Off times out.
Turn off Camera
Press and hold the Power Button for at least half a second and then release it (some
firmware versions require you to press the button for 2 seconds). The red LED will blink 3
times and the camera will turn off.
Switching between modes
The camera can be switched between the different modes by pressing the Mode button.
Each button click advances the camera to the next mode. Video Mode1 – Video Mode2 –
Photo Mode – Playback Mode (only if A/V cable is attached) – Video Mode1 etc.
Recording Video Mode 1 or 2 (yellow or blue LED)
Start video recording and write-protecting important clips.
· Briefly press the shutter button.
· ► If the recording LED has been disabled, the yellow or blue LED will blink 3 times
and then turn off, indicating that recording has started.
· ► If the recording LED has been enabled, the yellow or blue LED will slowly flash at
2 second intervals indicating that the camera is recording.
· The current clip can be write-protected by pressing the Mode button while recording.
Depending on the length of the recording, the previous or next clip may also be
marked as write-protected (read-only).
Stop video recording.
· Briefly press the shutter button. The camera will return to the standby mode from
which the video was started.
Taking a Photo (red LED)
· Briefly press the shutter button. The red LED will flash indicating that a picture was
taken.


Leave a Reply
You must be logged in to post a comment.