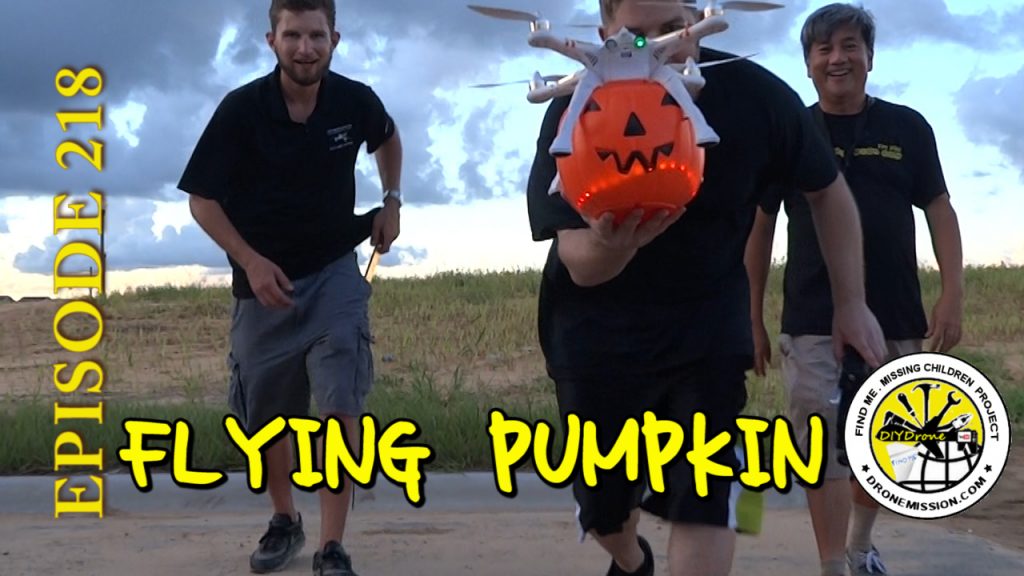
We had with us the Flying Pumpkin Drone for this Halloween. Using the two classic quadcopters, the Walkera X350 Pro and the DJI Phantom, we had a blast just flying this lighted up pumpkin around the estate. It was a stormy day out.
On the bonus scene, you will find the neighborhood kids having a fun time with Trick-or-treating last year, great memories when you have a little one running around. Here is a take from the flying pumpkin day… enjoy!
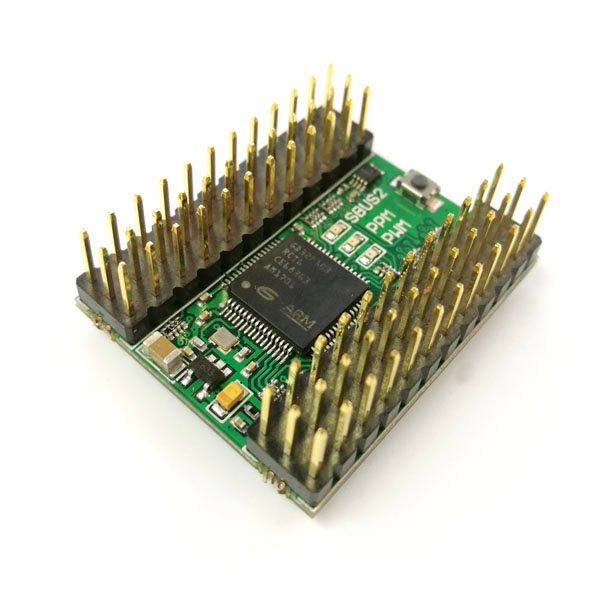
RMILEC Signal Converter Signal Analyzer V3. If you want to test or fly with a SBus receiver without a flight controller the old fashion way, you are in luck; this signal converter is able to convert SBus signal into PWM signal and two-way PPM signal. It can also convert PWM signal into PPM signal and SBUS signal, or convert two-way PPM signal into PWM signals and SBUS signals. Amazing! I will take some video to give you some ideas of what you can potentially use it for, probably more ideas than I can suggest.
Besides debugging signals, we plan to use the FrSky R9 MM, the latest long-range 900MHz mini receiver on a plane, so one option is to use RMILEC signal converter and connect directly to each servo leads. The RMILEC Signal Converter carries a small footprint, about a size of a SD card. There is also an older version that incorporate a LiPo alarm of this converter, in that way it also function as a low voltage warning system…
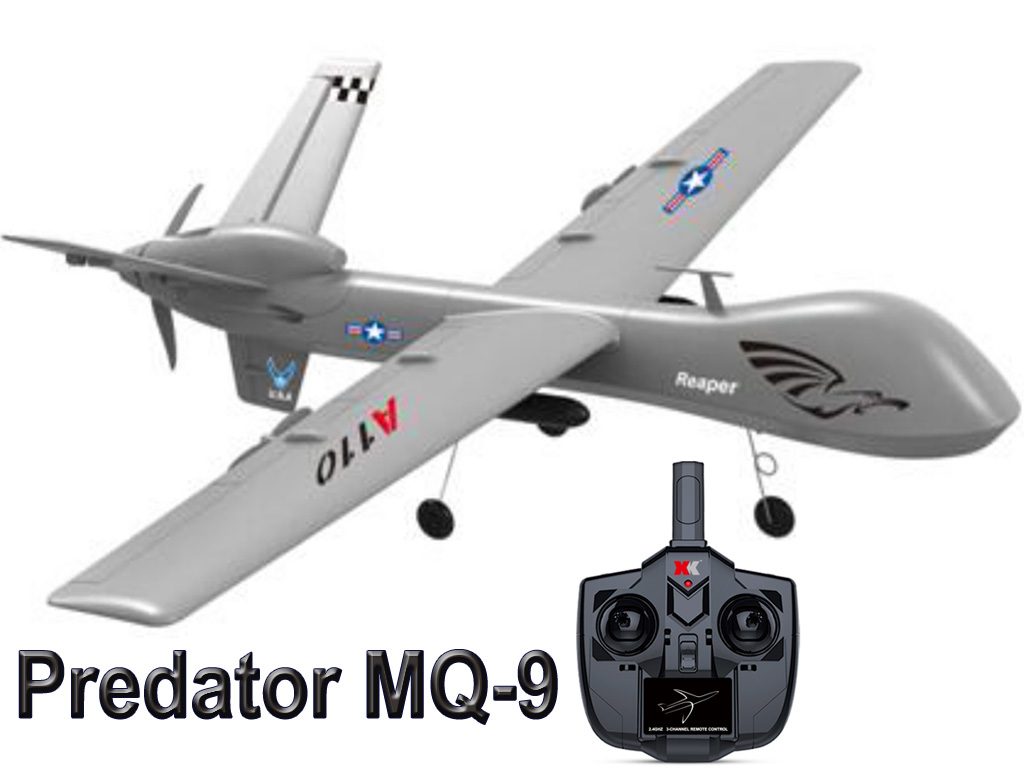
XK is one of my all time favorite manufacturer that makes ready to fly (RTF) self-stabilized drones. This XK A110 is modeled after the Predator MQ-9 drone using 3 channels. XK A110 Predator MQ-9 is very light and uses differential trust, just like a quadcopter, to power the turns instead of using a rudder. Two small propellers, one on each wing. A little disappointing, the back larger propeller is just a dummy prop that only adds some drag.
The pusher propellers are dual-engine powered and rotates in opposite directions to cancel each other out of the counter-torque; that keeps it more stable and in path. Comes built-in a 6-axis gyroscope flight auto-stabilization system with dual rates, allowing me to perform some aerobatics such as loops…
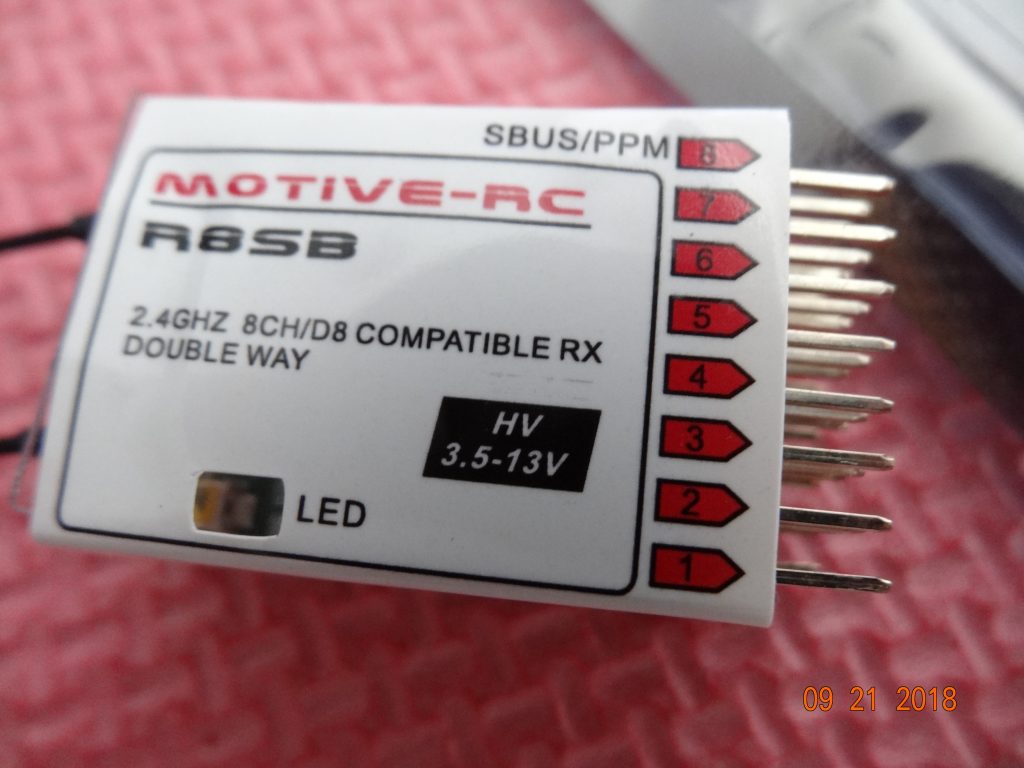
I still fly lots of planes the old school way, without any flight controllers, so this Motive RC R8SB all-in-one receiver even though a D8, it allows me to use my Taranis radio transmitter and most of the features. Add a voltage sensor and I am all set. The receiver comes with various model type SBUS, physical channel PWM outputs, PPM and RSSI. The RSSI warns me about the signal strength before I fly too far out. Here is a video on how I add a RSSI bar to my X-Lite screen using the Motive-RC R8SB.
The R8SB is like the FrSky V8R7-II receiver but with telemetry functions. It bound instantly and lights up like a green lantern. There are more pins than a usual receiver, but they are nicely color coded to help me determine signal, power and ground. The upper set of pins are your 8 channels or SBUS/PPM. The lower set of pins are RSSI, two analog telemetry ports (A1&A2), A1 for internal receiver battery voltage sensor, A2 for external battery voltage sensor (0~30V, 1~6S) and one digital data-stream port (Rx, Tx)…
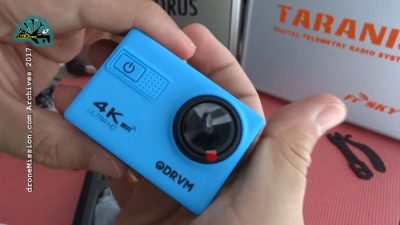
The latest actions sports camera ODRVM 4k talks. We took it out to compare with the Git2 camera. Here are some sampling of footage filmed at Disney. These ultra vivid cameras are becoming very affordable these days.
The ODRVM comes with in a very nice case with accessories, a user guide in 4 languages. It comes with a remote controller, a great way to start/stop a recording from the distance or when the camera is placed in a location not easily reachable.
User Segment
Camera Enthusiast, Budget $69 (May 2017 source: Amazon)
Our Notes
Lets take a look at the camera. On the front we have the power and mode button. The shutter/recording button is on the top with a LED indicator. By placing the LED indicator on the top, helps to prevent a blinking reflection while filming closeups and through a window. The back contains the 2″ LCD screen for framing shots. Battery compartment is at the bottom. Right side has the button that allows you to scroll up and down button, a speaker and the WiFi on and off button. On the left side has a micro USB, micro HDMI output, microphone, and a micro SD slot.
It is slightly bigger than a GoPro 3, but is actually lighter, weighing just 63 grams.
The details are sharp, colors are vibrant. The ODVRM has an excellent wide dynamic range, even when a subject is backlit by the sun, you can usually see their face. The saturation is good without looking over-done.
The white balance on the camera adds colors to balance the light source, for example on a overcast day, the image can look bluish if left unadjusted. This auto white balance control in your camera sees the cool color temperature and adds some red to warm the colors, as a result you may see a tint of red.
The menu system is straight forward, simple to use and intuitive. The settings selected are displayed on the screen which is absolutely useful to view before you begin filming.
Voice prompt can be useful in some situations, it prompts you when your battery is low and each time you start and stop recording. You may find yourself turning it off after a while, unless you plan to edit out every voice prompt on the recorded videos.
The field of view options are 170, 140, 110 and 70. Anti-shaking and gyroscope is available as a option.
A feature we like is the auto time-lapse, a mood feature to capture moments in time.
The maximum photo size is 20m and UHD 4K video at 24 fps or more popular at 1080p 60 fps or 720p at 120 fps.
Filming at 4k is sharp, but not as smooth, and that seem to the same problem with the Git2.
Similar Models
Users have considered these 2017 alternatives: Git2, Firefly 6s
Factory Specifications
Video Resolution: 4K 24fps; 2K 30fps; 1080P 60fps; 720p 120 fps; 720p 60 fps Image Resolution: 20M, 16M, 12M, 10M, 8M, 5M, 2M , VGA selectable Lens: 170°/140°/110°/70° selectable Shooting Mode: Single Shot / Self-timer (2S / 5s / 10s / Double) Time-lapse Record: 100ms / 200ms / 500ms / 1Sec / 5 Sec Loop recording: Support Voice prompt: Support Motion Detection: Support Frequency: 50Hz/60Hz USB Interface: micro USB 2.0, micro HDMI Power Source Interface: 5V/1A Battery Capacity: 3.7V Li-ion Battery 1050 mAh (Two Batteries Included ) Recording Time per battery: 40 minutes/ UHD 24 fps, 60 minutes/1080P 30fps , 70 minutes/720p 120fps Operating System (OS): Windows XP/Vista or Above/Win7/Mac os
In terms of ranking, I would say it is in the top 4 favorites during this release recorded May 2017. An update to follow. (Current Picks dronemission.com/top5)
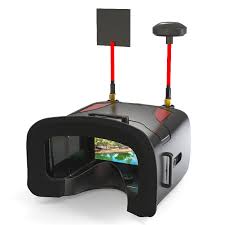
Just over 3 years ago, we had a challenge finding an affordable pair of goggles for FPV, let alone a DVR. Eachine VR D2 Pro Upgraded Goggle delivers an All-In-One (AIO) solution with built-in diopter correction lens, a DVR, dual diversity receivers, with RSSI, includes a tripod mount and best of all within budget
This is what I have been waiting for, corrective lenses for people who wear glasses, nearsighted, this helps just a little, I wouldn’t say it is compatible for everyone, but I can now read the osd without glasses having been using -2.0 diopter on all my other goggles. I have the lens slide all the way to the front. There is a slider on the left and right, and you just adjust it to best fit your eyes.
User Segment
FPV Piloting, Off the shelves. Budget [$] (PRICE CHECK: $89.99 ■ May 2017 Arthur’s Pick)
What To Expect
The menu system is broken down into 5 sections.
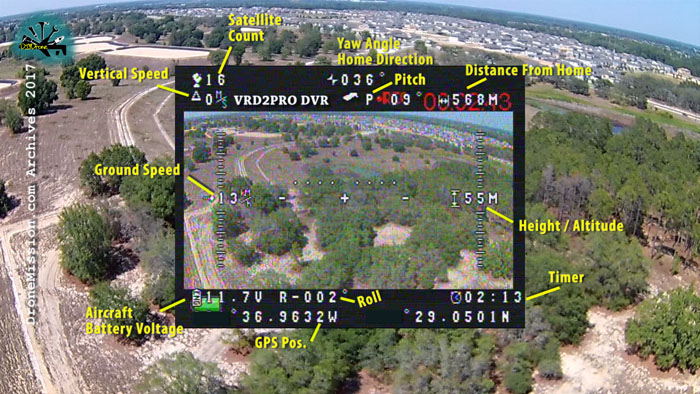
What I like about the upgraded functions are the On Screen Display (OSD) and Recieved Signal Strength Indicator (RSSI). The voltage of the goggle battery and frequency selection is shown; it is not recorded, but overlays on your screen. It is suggested that we calibrate the RSSI before each flight. The A&B signal strength helps me identify the direction of a lost aircraft to some accuracy, as you can hold the goggle against your chest and rotate around, and then foolow the direction with the strongest signal.
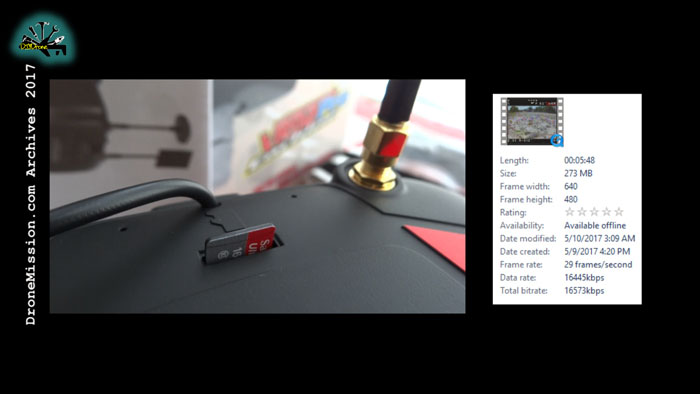
It accepts upto 64 gb of memory storage and records at 16000 kbps Bitrate at 29.97 fps.
Competitors / Similar Models
Users have considered these 2017 alternatives: Eachine Goggles2, Walkera Goggle4, Kylin Vision
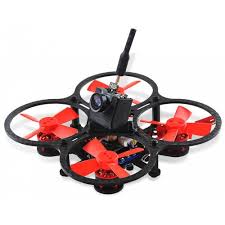
Makerfire Micro FPV Racing Drone is the latest entry into ducted fan micro racers joining the Tiny Whoop™ race. For the value and money, this quadcopter comes Ready To Fly or also available Crazepony the Bind-N-Fly version with DSM receiver. We received a BNF version from GearBest to test against a Devo 10 Deviation with DSM protocol and the results are good.
Analysis
Micro quadcopters have come a long way, with Jesse Perkins mounting a small FPV camera and video transmitter, showcasing some amazing indoor racing and calling it the Tiny Whoop™. Several manufacturers have since began to introduce their version of affordable ducted fan quadcopters and Makerfire Micro is noted to be a good entry in this category of indoor racing. The tall propeller guards allows the micro quadcopter to bounce off the wall without damaging the fans (propellers), surviving most crashes.
It is also beneficial to note that when paired with the popular opensource F3 flight controller, manufacturers are able to lower the cost of production. With a F3 flight controller, pilots can get several flight modes available instantly.
In Rate/Manual/Expert, this mode is the most challenging flight mode which uses the gyroscopes from the flight controller while the accelerometer is disabled . It allows the best control of the quadcopter, allowing pilots to do some amazing hairpin turns and aerobatics. This will however require some experience and not intended for beginners.
In Angle/Stability mode, the accelerometer is activated. This enables the quadcopter to self-level. If you don’t put in any input, the quadcopter will remain level. This is the mode that is used on the budget entry level quadcopters. It is however a great way for all pilots to practice control and orientation by flying in a number 8 pattern
In Horizon mode, this is a mix between Rate mode and Angle mode. It gives a pilot the best of both modes to perform flips and rolls and yet self-levels when the pilot centers the sticks but with Rate mode at it’s endpoint.
In the early days of racing drone, an inexperienced pilot would suffer a flip of death (FOD), but to the rescue, came “Air Mode”. In Air mode, pilots will be flying at all throttle levels, so if you chop the throttle, the stability corrections still come into play, even at minimum throttle, allowing the pilot to perform some amazing maneuvers at low throttle rates.
You will have to assign Air Mode as you would to a switch when setting up flight modes within Betaflight. The suggested best practices to test Air mode are:
Arm motors (motors start spinning idling as an option)
Enable AirMode with switch (check to ensure no idling windup on ground)
Lift off and fly around (motors will never stop in flight even at lowest throttle and self levels)
Just prior to landing, disable Air Mode by switch (as a safety)
Land and disarm motors
The benefit of using ducted fans is they are fully protected and prevent the fans from causing any damage to walls, as well it is safe enough to be caught by hand!
One of the best kept secret of a Walkera transmitter is the ability to support multiple protocols with opensource Deviation. So if a pilot is flying a selection of models, such as Walkera, Blade, Eflite, Hubsan x4, Parkzone Micro Warbirds, Spektrum planes, you can turn an affordable Devo transmitter into a power house that supports these protocols. With a Walkera 12E 12 channel radio transmitter selling at $85 versus a Spektrum JRP12 at $1249, you can see the cost benefit of marketing a Walkera Devo 10 or 12E for micro racing drones.
Pilots can easily spend 5 minutes on each flight, setting up and flying. The actual flight may last 3-4minutes. On a Mode 2 radio transmitter, throttle stick is on the left.
Binding the Makerfire Micro to a new radio transmitter can be a challenge, you will likely need two pairs of hands to hold down the bind button, at the same time power on. However, you only have to do this once.
Once you have your radio bound to the Makerfire Micro, you will want to run some tests within Betaflight Goggle Chrome App. You will need a USB cable to connect your quadcopter to a computer. Make sure your throttle is within range, and the receiver is responding in the right direction for all stick movements.
To begin your first flight, power on your radio transmitter first, make sure your throttle stick is at the lowest point. Check to make sure all your switches are up (position 0). Connect your battery to your copter, lay the copter flat on a hard surface immediately.
Move your left throttle stick down to the lowest point and to the right, to unlock (arm) the motors. The copter is now live. To lock (disarm), move your left throttle stick down to the lowest point and to the left. You can change your setup to switches with Betaflight.
Flight Characteristics
The Makerfire is easy to fly on Horizon mode and can be switched to Angle mode or Rate mode. It accelerates at a high speed, so setting up dual rates is a good idea. Low rates at 70 scale on 30 exponential is a good start. It survived all of our indoor and outdoor crashes, which makes this quadcopter a hardy little thing.
Market Segment
Beginners, Indoors, Park Flyers, Ready To Fly, Off the shelves, Budget [$] (PRICE CHECK: $64PNP ■ Mar 2017 Sara’s Pick)
The camera is a acceptable 520 TVL camera, capable for night flying. See video for results.
Factory Specifications Flight controller: F3 EVO with STM32 F303 MCU Receiver: DSM 2.4GHz 8CH Video transmission: 5.8G 40CH 25mW Video resolution: 520TVL Receive distance: 300m Motor: 615 coreless motors with 65000 RPM Battery: 3.7V 200mAh 35C Flight time: about 5 minutes Charge time: 30 minutes Charging method: USB
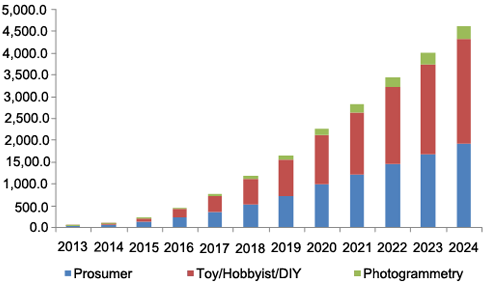
Market Demand Trending
Buy/Sell. Manufacturers and dealers, these tiny inspired whoops are hitting the market as fast as the first phantom and 350 pros were a few years ago, as hobbyist takes a turn towards micro quadcopters; showing a steady growth in the market. A snapshot from Grand View Research 2016.
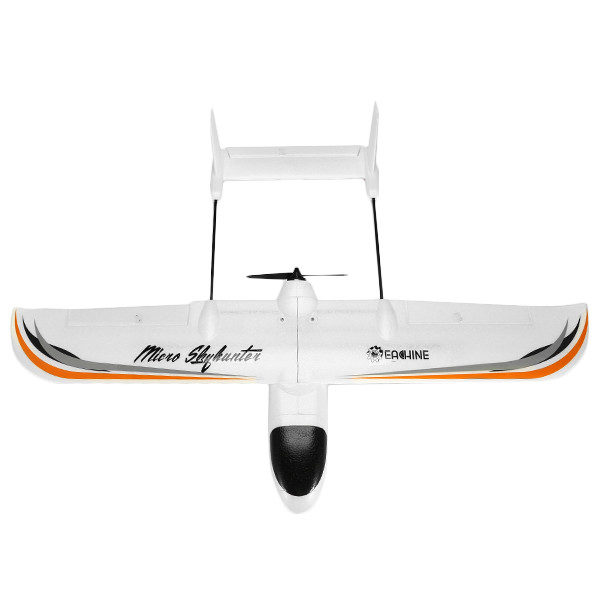
Skyhunter, has been an all-time favorite plane for lots of long-range FPV pilots. Eachine doing it’s match, takes on the micro version, at 780 mm, 3 channels, plug and play. Take a break from the racing drones, here comes a racing plane. If you are looking for a budget, simple hand launch RC FPV plane with some speed, you may be in luck.
User Segment
Keen Beginners, Park Flyers, Plug and Fly, Budget $59 BNF (source: Dec 2016 Banggood)
What To Expect
The Micro Skyhunter FPV is one of the coolest miniature version of the Skyhunters released under the label of Eachine. I have here the FPV version with 40 channels and 800 tvl camera which you can just slip on or remove anytime.
Here is a video of everything you need to get setup.
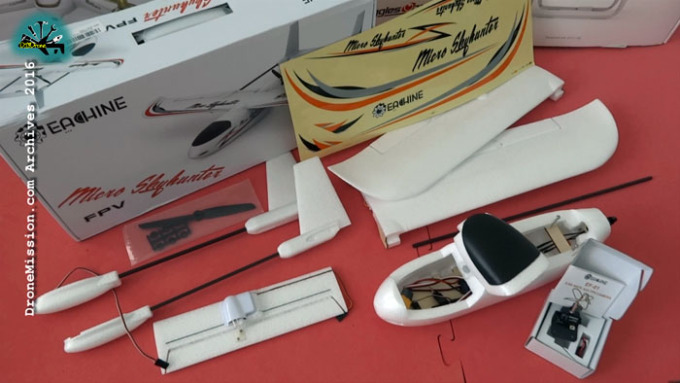
The Skyhunter comes in this small box just under 1 1/2 feet, very well pack, box in a box and individually wrap. All electronics are pre-assembled, plug and play, so you can begin flying on the same day. It comes with a few cabon fiber spars, the main spar and re-enfocement along the wings. You can see the signature look of a skyhunter with two veritical stablize. I like how everything is pre-installed, 5 grams servo, servo linkages are all ready using JR connectors. Included is a Hobbywing 20 amps electronic speed controller(ESC) with a XT 60 plug.
There is plenty of room, you have three separate compartments, one section for your receiver and flight controller if you are using one, and a two in one canopy held on by magnets for the battery and a convenient camera fpv bay. The wings are held together with two bolts.
The camera is pretty good, other than the 25 mw range limitation, we have no complaints. You can of course always use a different video transmitter. There are some crack lines, along the joints, but nothing too serious, I just add a little tape along it and tape along the leading edges, wing tips and base for additional protection and to prevent wear and tear.
Motor is powerful for this size plane, 2300 kv 2204.
The camera comes with a holder plate, very nice, and you simply secure it on the camera bay when in use. I just tape the plates down for easy removal.
Decals are included, but I like my usual red/blue white colors.
Overall, this plane has everything you need, easy to assemble as all the electronic are installed. It uses XT 60 which means LiPo batteries are easily available in the market. The bigger question is, are you up for a 3 channel plane, if you are, this is definitely a keeper within budget.
Flight Characteristics
Tracks very well, but not a great glider. We are currently completing a few more flights before reporting back. Standby.
Camera & Video Transmitter
The camera is okay, a 40CH 25MW VTX 800TVL 1/3 CMOS FPV Camera. See video for results.
Factory Specifications
Brand Name: Eachine Item Name: Micro Skyhunter Wingspan: 780mm (31″) Length: 540mm (21″) Channels: 3 Weight: 230g (without battery) Color: White Material: EPO Camera: Eachine EF-01 AIO FPV camera ESC: 20A 2-3s with XT60 connector Motor: Eachine 2204 2300KV Motor MAX Thrust:440g Motor Weight: 25g Motor Shaft Diameter: 3mm Propeller: 6×3 or most 5-6″ multirotor props Servos: 3x 9 gram
What we love about it
Well design and quick assembly
What is essential we hope to see in the next version
Nothing really to change, but love to see more miniature version of classic planes under the Eachine label
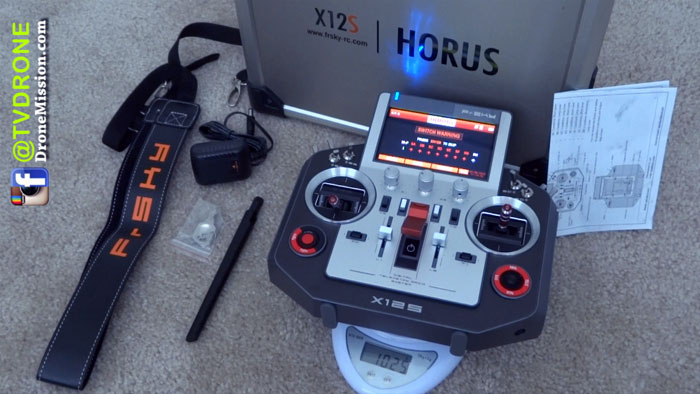
Frsky Horus X12S radio transmitter, 16-32 channel system, is built to make you the God of the Sky, just like the Egyptian God Horus. Just tilt the transmitter to facilitate auxiliary control as there is a built-in 6-axis sensor. Includes Voice Alerts for things like; audible count down timers, low voltage warnings, landing gear down warnings etc., just about anything can be programmed and with full telemetry capability and GPS. ■ by dronemission.com
First Impression, the material used is heavy-weight milled CNC aluminum, like a military-grade version of the popular Frsky Taranis. It is impact resistance, weight just under 3 pounds. The sticks equipped with six ball bearings for precision and durability. A lot of programming features to keep you up learning and discovering.
What To Expect
It may be overwhelming at the first, but take your time to explore features of a Horus. One of the best features of the Horus is its full telemetry capability, as well as RSSI signal strength feedback, there are 3 different programmable failsafe modes and receiver lock, so no more crashes due to selecting the wrong model. If you have stock in other brand receivers or B&F’s, no worries the Horus has a JR style RF module slot, so you have the option of other brand modules such as the Orange DSM2/DSMX or Open LRS 433mhz module. An inbuilt GPS module helps your model know where you are at all times, making it easier to return to you.
Similar Models
Users have considered these 2016 alternatives: Frsky Taranis
Factory Specifications
Brand: Frsky Item Name: Horus Number of Channels: 16CH / up to 32CH Operating Voltage Range: 7~15V (2s,3s lipos acceptable) Backlight LCD Screen: 480*272, high resolution TFT color screen Model Memories: 60 (expandable with SD card) Advance Functions: Full telemetry capability inbuilt GPS module Gyro: 6-axis sensor (3-axis gyro and 3-axis accelerator) Trainer: Inbuilt wireless trainer system Compatibility: FrSky X series, D series, L series and V8-II series receivers
What we love about it
Audible count down timers
Audible programming
Low voltage warnings
What is essential we hope to see in the next version
FPV video screen and DVR
In terms of ranking, I would say it is in the top 7 favorites during this release recorded November 2016. An update to follow
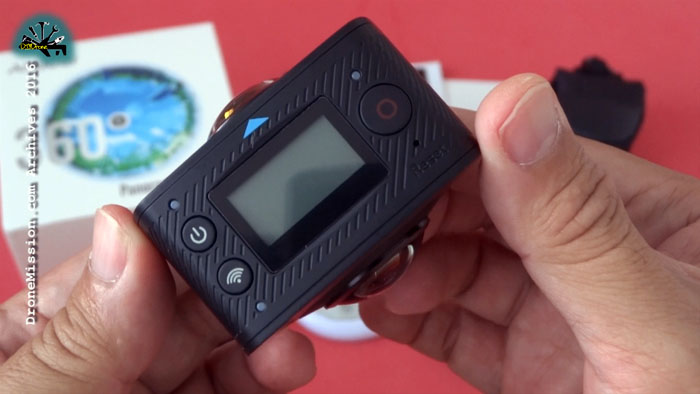
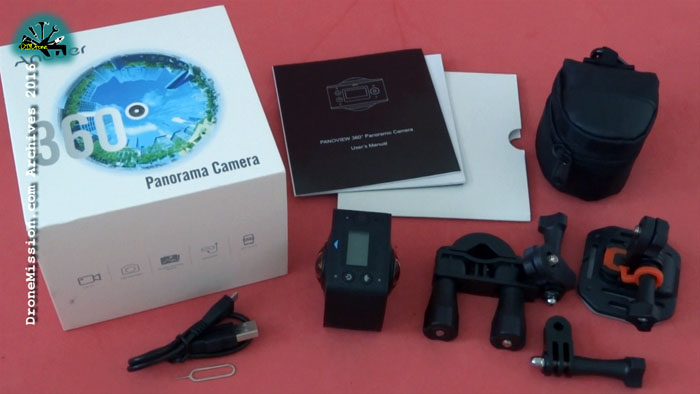
What the Andoer Dual-lens 360°, Ricoh Theta S and Samsung Gear 360 have in common are the dual-lenses that allows you to film and upload 360-degree videos. This give rise to a new perspective if drone aerial first person view
YouTube and Facebook now supports uploading and playback of 360° spherical videos. To watch 360° videos, you need the latest version of Chrome, Opera, Firefox, or Internet Explorer on your computer. On mobile devices, use the latest version of the YouTube app for Android or iOS.
(Best viewed in 360 youtube app or goggle directly by opening this link https://youtube.com/360)
For an immersive experience, you can even watch 360° videos with a cardboard goggle attaching the YouTube Android app.
After a week of filming, we begin to discover that is just a few things to consider before creating the video.
Decide the best way to mount the camera without appearing to be holding a tripod (you likely don’t want to be showing your crown, if you realized you are being filmed no matter where you stood in 360).
What if you want to incorporate text on the video or include a logo, not knowing if your audience is looking front, back, sides, down or up.
Storyboarding and sequencing scenes in 360. How do you mix 2D and 360 footages?
The following 360 cameras are compatible with YouTube and are available today: • Andoer Dual-lens 360° (budget $125 source: Nov 2016 camfere.com) • Ricoh Theta S • Samsung Gear 360
For the best results, encode your video at a high resolution and according to YouTube’s advanced specifications. YouTube currently supports 360° videos with 24, 25, 30, 48, 50, or 60 frames per second. We recommend uploading 16:9 aspect ratio stitched videos in 4K (3840×2160) resolution as a loss of resolution is inevitable when playback in youtube 360. A 1080p video, when stretçhed and wrapped around the sphere will look like 480p.
When uploading your 360° video, don’t make edits to the video using the YouTube Video Editor and Enhancements tools on desktop or mobile. These tools don’t currently support 360° videos.
Before publishing, schedule the video for a later date and verify that the file has 360° playback enabled by watching the video on your device. It may take up to 30 minutes for 360° playback to be processed after uploading.
360° videos on a browser feature a pan button in the top left, and can be rotated using the WASD keys, so look for these features to confirm your video is in 360.
If you take the video straight out of the camera and try to upload it to Youtube, it’s not going to work properly. The video will upload and be available, but when you go to view it you’ll see a stereoscopic image–an odd-looking video of side-by-side circles, each showing the hemisphere captured by one of the two lenses.
To make it work properly there are two steps you have to do before uploading it.
1. You will need to convert the image from stereoscopic view to an equirectangular one. That will combine the two hemispheres into a wide view with dimensions where the width is exactly double the height (otherwise known as a 2:1 aspect ratio). And the tops and bottoms of the frames will look strange and stretched. But when used in a specialized 360° player those stretched parts of the frame will fill out when you look up or down, wrapping around the sphere 360.
If you own the budget Andoer 360 camera, you can use the recommended unregistered Symax 360 software – Open Convertor, set Video Quality = High, Start.
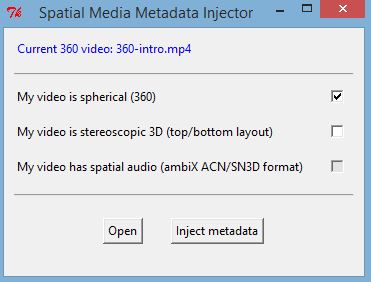
2. In order to upload and playback a 360° video file, you’ll need to modify the metadata of the video file with an app or script before uploading.
Follow these instructions to install an app that will add the necessary metadata into a new file for you.
Download the 360 Video Metadata app for Mac or Windows recommended by YouTube
Un-zip the file, then open the 360 Metadata Injector app. If you’re on a Mac, you may need to right-click the app and then click Open.
You can also add the metadata using a Python script.
Select the original or edited 360 video file
Select the checkbox for My Video is Spherical (360) and click Inject Metadata. Do not select the “3D Top-bottom” checkbox. For more information, refer to upload instructions for virtual reality videos.
Save the file that will be created suffix with “injected.mp4”.
Save the file. A new file will be created automatically in the same location as the original file.
Upload the new injected file to YouTube.
Wait for the 360° conversion to process. This may take up to 30 minutes for a 7 minutes video.